Showing posts with label Work In Progress. Show all posts

Saturday, January 17, 2015

Dice tower - part 1

Dice towers aren't for everyone, but with the kids chasing dice across the table - especially when we play Munchkin (and I'm not keen about them tossing the dice into the Munchkin Dungeon rooms) I figured it was time for a tower.

Thick card for base and half the walls,
 Thin card for the other walls, giving the 'boot'shape,
 Thick card struts to support the rolling surfaces,
 All glued together,
 Starting to add the texture to make it a bit more exciting,
Stay tuned for the next update!  :)

Friday, January 2, 2015

Sometimes, ya just gotta go overboard

So, you may recall that after playing Munchkin at the last big game afternoon we held I ran out soon after and bought Munchkin: Legends for the home collection.  I then drew up a basic version of the game board that can be used to indicate Level progress for the Munchkins, rather than just the counters that the basic version suggests.

Well, I then got all carried away, and L got carried away, and we brainstormed, and decided to make a big board for Munchkin...

So I...

-got some foam (that nice denser blue foam, for improved carving)

-drew out the 'dungeon' (roughly based on the original Munchkin Advanced layout)

- started carving out the rooms, card spaces, discard spaces and dice holder.
- let it age for a couple of months.  (Like a home brew, it should be laid down for a while to mature. Or maybe I just got distracted by family and pre-xmas for a while)

- realised that I wanted to use it soon, so frantically got back into it.  Adding a base and starting to cut out and stick down cardboard pavers and the numbers on the floor.

-eventually had to pull an all-nighter where I paved and bricked the rooms, floorboards in one case.  Added room dressings to give each room a unique theme.

-got out ye olde airbrushe to base coat the rooms in black...

- used the airbrush to add texture to the pavers, bricks and walls.  This was fun as I hadn't used the airbrush as a detail brush in a looong time.  Had to re-learn how to get the right consistency for the paint and adjust the needle and seat and keep the tip clear...  Really happy with the result though. 


- did more drybrushing, detail painting, and painted the 'surface'green in readiness for flocking.

-ready enough to go for the games day.  (which was only a few short hours of sleep away) However, each room needs more detail, and there still is flocking to do.  So there will be more to come on this project!


Yay!  clunk...snooooorrreeeezzzzzzzzzzzzzz

Monday, September 15, 2014

FWC thoughts

Still keen on FWC with an Epic flavour. So, after a random thought this week, I've thrown together a few formation cards to facilitate the selection of standard companies/squads/etc for a battlegroup.
It's fun thinking up combos for cards, but makes me realise I need to paint up a number more stands.


Monday, April 15, 2013

Squats tend to tinker, ya know.

Speaking of Squats, I was considering the options available in the list for them and was feeling a bit restricted.  So I figured, ya know - I bet you'd have a hard time convincing a Squat not to re-jig their equipment any chance they could get.

So I got to re-jiggering...

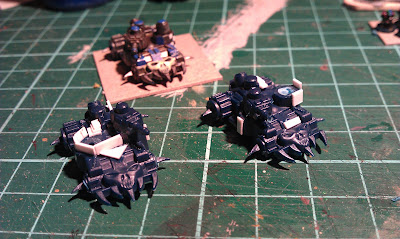
The flamer on the Squat Trike is a nice piece of kit, ignores cover and hits anything in a line for 20cm... but sometimes you don't want to get that close.
Sooo, well, I've got all these Imperial LasCannons just lying around.  How could a short hairy engineer resist the temptation?


Nice!

Now... that covers those that like to reach out and tap something, but what about those that like to clamp on the trigger for some real rock'n'roll?

Heavy bolters for that!


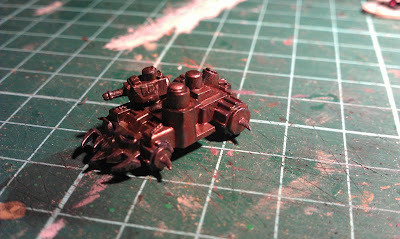
Finally, the standard 'Rhino' APC is a bit of a light-weight.  Any Squat worth his steel-cap boots and overalls could see it needs to be up-gunned.  More LasCannons!

Not quite an IFV now, but with a bit more to add to a fire-fight...


 Looking forward to finishing the paint jobs on these and adding them to the Brotherhood motor pool!
  

Waargh!

Just a quick update on the Orks.  

They are coming along nicely, although slowly (as all wargaming projects are at the moment)

Soon the first batch of boyz will be ready to charge out and cause some havoc for the local Squats.

L-R: Gun Wagonz, Gretchin, Boyz, Warbozz, Attack Wagonz, Nobz, NobBozz.


Saturday, December 1, 2012

Da Mekboy

Every WaarghBoss worth his teeth needs a Mekboy to look after all the tinbitz and stuff that goes dakka dakka.

So one will make a good HQ stand for my boys.

Here's one underway... (Mods made to a Nob figure)


Tuesday, June 5, 2012

Da Waaugh Boss

Then I got thinking (while at the sink doing the washing up) "These Nobz and Warboss figures are all very well - but I'm using those as elite infantry and HQ stands, what am I going to do for a CinC?  The Waugh Boss himself?"

I need a big figure, Imperial Xenobiologists all agree that Orks increase in height and muscle mass as they improve their standing in the Clan.  So the CinC is going to be the biggest and baddest...

I got it!  An Ogryn figure - 'ere we go!'   Bigger shoulder pads, bigger gun, heavy brow, ears(?), and a steel lower jaw - so far.  Can I fit more on?


Gunwagonz - score!

So, I'm rummaging around in the boxes under my desk looking for some gap-filler for basing, when I knock a box over and hear a distictly plastic-y sprues noise.  "Whats that?" I thinks to myself, opening the box.
Woo-hoo! A number of Ork Gun Wagons from the old Titan Legions box I've had sitting in the garage for years.  Must have brought them in one night and forgotten about them!  Perfect timing for the new project!

So here we go - I've already put one together and primed it, and this second one is the first of the mods.  They're just not quite lumpy enough as they stand.

So I've added plates, some extra fuel tanks and shortened the gun barrel.

I think the next one will have a change to the roller thingy.  Something toothy...

Monday, June 4, 2012

Kustomizin Warwagonz

Made a few small changes to the warwagons, just so they look more hand-crafted by the Mekboy, instead of coming off a factory production line.


The photo seems to be bringing out more of the brown ink wash than you usually see.  The finished versions don't really look that bronzed.

Friday, June 1, 2012

Ork Warwagon

So how to paint an Orky Warwagon?

Well, I figure first its built all out of sheet metal.
Which then gets rusty.
Which then is handed to a bunch of Orks to paint. They like blue, checks and glyphs.

 Turned out pretty good, I think.

Next ones will have additional panels added.


Published with Blogger-droid v2.0.4

Monday, May 28, 2012

Deathskullz

Orkses!

First strip of 6 boyz pretty much complete (maybe a brown wash required?) for my first colour trials.  I'm happy with how they turned out...

Gone with the GW 'Deathskullz' flavour for these boys.  Pretty traditional Orks with a taste for the lucky colour blue.


Coming soon... the prototype paint job for the Boyz' battlewagonz...

Tuesday, May 22, 2012

Achievement! Picked up a paint brush!

Yowza! Actually managed to put a bit of paint on ...

Orks!

eBay has provided a small amount of Orks to provide another challenge for my Desert Squats, who just want to get on with peacefully strip-mining the resource rich Procyon IV.

Just trying to settle on the colour scheme for the Ork Boyz and their battlewagons. I'm thinking Deathskullz, making blue a bit of a feature colour on them (its a lucky colour for Orks).

This is all part of my plans for solo gaming Future War Commander on a 2 ft square desert scenery board.
Published with Blogger-droid v1.6.6

Tuesday, November 10, 2009

Workbench

So what's next?
Well, time for this force to get some leadership, so I'd better get a command stand done. This'll be a HQ stand.

Saturday, September 19, 2009

Workbench

Making some progress...

Finished the base of the 25pdr and flocked another infantry base.


Drybrushing the Matilda II and almost ready to camo and detail, then base.

Apparently the camo was a shade of blue...
should be interesting...

Friday, September 11, 2009

On the workbench

Work in progress, ...

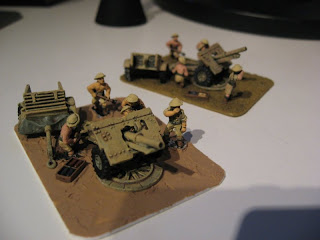
Finishing off another stand with a 25pdr Howitzer and team. The foreground stand is the one nearing completion. It just needs the base flocked and tidied up. The background stand was completed some time ago.


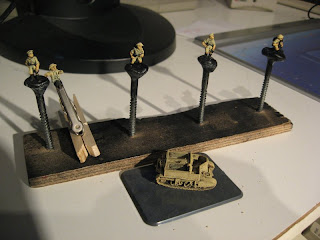
Base coated a Matilda II infantry tank. I've based it in a medium brown and then worked a dark brown into all the grooves and corners with a half-wet brush. I'm hoping when I drybrush the main colour on it will help with the contrast.